
THE GLINT
RESUME OF "THE GLINT"
The Bachelor project “The Glint” is a short trailer or film excerpt designed to pique the viewer’s curiosity without telling a full story. It presents a woman’s randomly filmed experience, requiring an understanding of the term “found footage.”
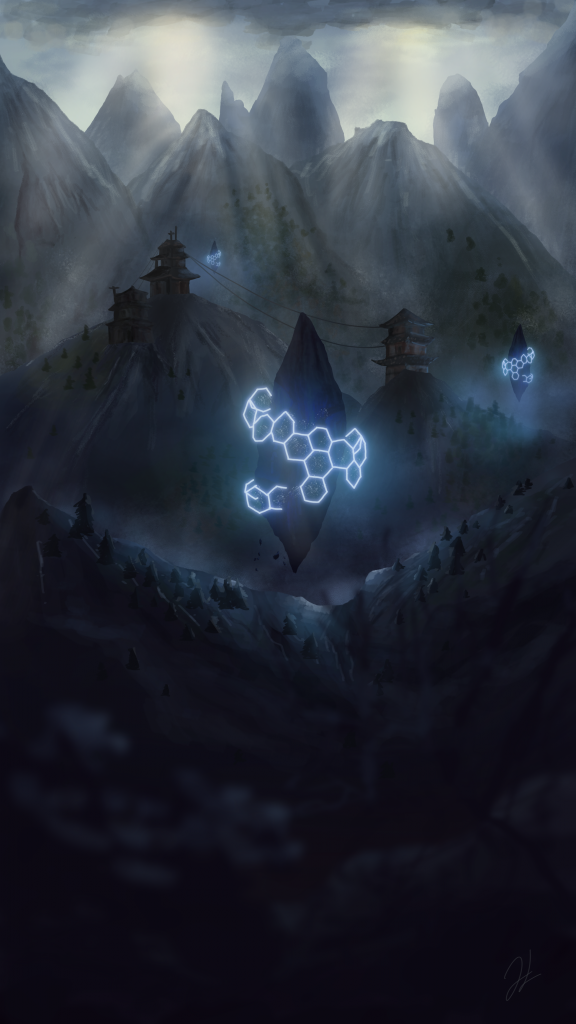
The trailer begins in darkness, relying on sound. A phone camera in portrait format (720×1280) quickly pans up to reveal a partially snow-covered mountainous landscape with Chinese temples, shrouded in twilight and mist. Three large, floating, teardrop-shaped rocks emit a strong blue light and are surrounded by an electric hexagonal shield. The shield is partially transparent and has gaps revealing the rock surfaces beneath. Bush branches in the foreground suggest the person is hiding.
The woman zooms frantically on the nearest floating rock, then shifts to the other two, causing the hexagonal walls to pulse electrically. Panicking, she zooms out. The nearest shield expands toward the camera, and she drops the phone in fear, running away. The camera displays only static as the shield envelops it, leading into the credits interspersed with poor-quality snippets of radio and news reports about an alien invasion and the downfall of humanity.
BACKGROUND
The Glint is set in the near future and follows a young protagonist who believes in life beyond Earth and has always searched for supernatural phenomena. Seeking adventure, she ventures into the remote Tibetan mountains, where she discovers ancient, abandoned temples. After a long, uneventful journey, she finds three floating rocks surrounded by a blue, hexagon-patterned, electric shield.
As she films this discovery, the shield begins to pulse, accompanied by a strong vibrating noise. Unknown to her, the noise is from aliens. The largest shield unexpectedly expands infinitely, forcing her to flee, leaving her camera behind. The recording cuts off as the camera’s technology interferes with the shield.
The woman survives by hiding in a rock crevice. Later, she discovers that the floating rocks are alien ships attempting to communicate with humans. The shield’s energy gave her new abilities and knowledge about the aliens.
The story concludes with radio and news broadcasts in the credits, revealing a global alien invasion and its potential threat.
CONCEPT ARTS
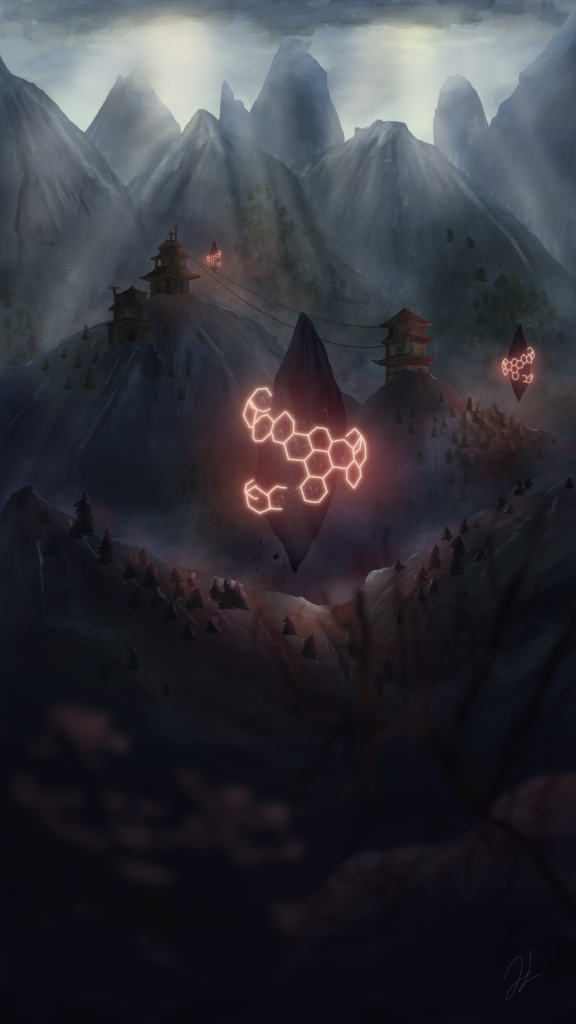
With the collected inspirations, two concept arts were created before the implementation in 3D. Until the lighting phase, it was not clear whether the protective barrier would be red or blue.
MODELING
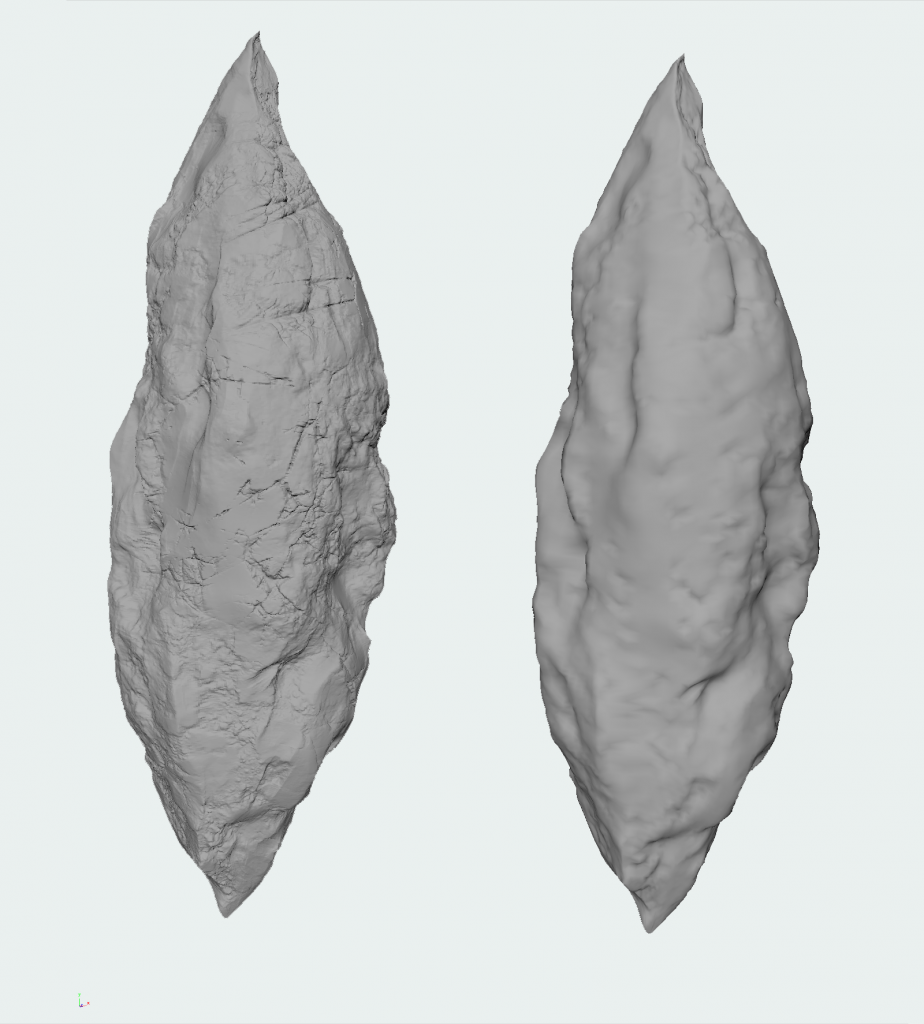
The objects are primarily modeled in Autodesk Maya, with Zbrush used for detailed refinement of stone objects using Andrew Averkin’s brush set from the indie game “Utopia Syndrome”. This allows for quick creation of realistic stone textures. The goal is detailed modeling while maintaining manageable polygon counts to avoid lengthy render times. Objects are optimized by reducing unnecessary polygons and used as placeholders in scenes.
Maya’s “Sculpt” tool, paired with displacement maps from satellite imagery, efficiently creates mountain landscapes. Modeling hexagonal grids involves starting with cylinders, using the “Poke” tool to create triangular polygons, and chamfering vertices to form hexagonal meshes. A deformer adjusts cylinder sizes to fit specific rocks. Beveling edges of duplicates creates varying thickness around hexagonal polygons, achieving a broken wall effect by deleting selected polygons.
Temples appear ornate due to textures; their models use basic geometric shapes for walls and roofs, with no need for additional modeling in Zbrush given their adequate detail at a distance.
Foreground bushes, often obscured by depth of field, are easily created using Maya’s “Paint” tool. Maple trees, appropriately scaled and blurred for depth, serve as bushes, controlled by tool settings for branch and leaf distribution.
Overall, Maya and Zbrush tools efficiently create detailed objects and environments while managing polygon counts for optimal performance in the project.

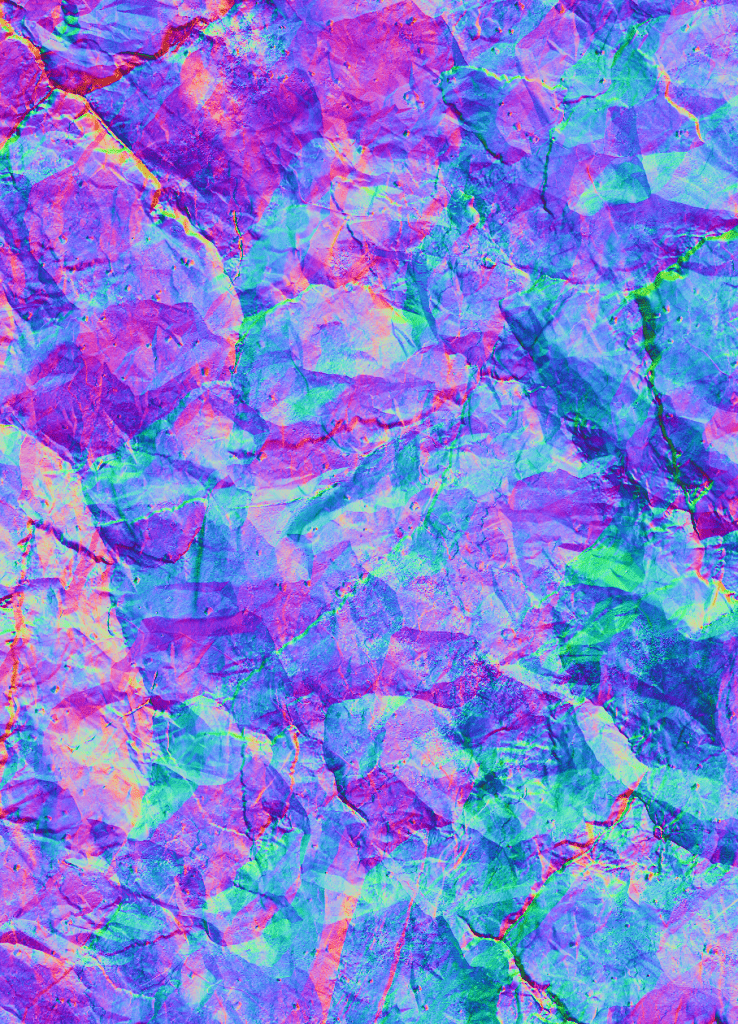
TEXTURING
Before texturing, it’s essential to properly UV unwrap the objects. Textures are crafted to be as realistic as possible, with less detail required for objects further from view. Substance Painter generates necessary maps for objects: Basecolor, Metallness, Roughness, Height, and Normal.
“Substance Share” provides free materials that are particularly suitable for combining with the temple.
In Maya, the exported maps are connected to Arnold’s AiStandard material. Normal maps are used for bump mapping, and height maps for displacement.
LIGHTING
Before texturing, it’s essential to properly UV unwrap the objects. Textures are crafted to be as realistic as possible, with less detail required for objects further from view. Substance Painter generates necessary maps for objects: Basecolor, Metallness, Roughness, Height, and Normal.
“Substance Share” provides free materials that are particularly suitable for combining with the temple.
In Maya, the exported maps are connected to Arnold’s AiStandard material. Normal maps are used for bump mapping, and height maps for displacement.
COMPOSITING
The scene from “The Glint” follows a deliberate composition, emphasizing irregularity to capture the viewer’s attention. Three floating rocks and three temples are arranged irregularly, contrasting with the central rock’s strong regularity, which does not follow the golden ratio, unlike the other objects. Although the central rock is positioned in the middle, the focus shifts to the side. Despite the irregular arrangement, the objects are easily distinguishable, maintaining a sense of order without being overly complex. The scene is fast-paced, offering a brief glimpse for orientation.
Dimensions are highlighted by the size of the trees and temples. The intimidating floating rocks appear colossal, supported by towering mountains that extend to the top of the frame, beyond the camera’s full capture. The predominant cold blue hues enhance the icy, snowy landscape, evoking a sense of coldness and reflecting the unnatural, electronic atmosphere. The scene feels alien and expansive, with scattered, seemingly abandoned houses, conveying loneliness and isolation.


Before moving to 3D implementation, some tests were conducted to analyze handheld footage behavior. Various natural scenes were filmed using a smartphone, focusing on zoom, panning, timing, and lighting. The selected footage, which had suitable panning, was imported into Nuke. A “Camera Tracker” with appropriate parameters was used, including a ground plane for reference. The tracked data was represented as 3D points, allowing the creation of a camera that mimics the footage movements. This was exported as an “ABC File” and imported into Maya as a non-animatable camera. To adjust camera movements, it was placed into a “Locator,” enabling additional animation to correct or enhance movements with minimal effort, creating a handheld camera effect in Maya.
Additional workflows include animating floating rocks to appear natural, achieved through subtle up-and-down movements to simulate magnetic repulsion. The lighting geometry around the rocks was animated using “Blendshapes.” Duplicated geometries with slight modifications were linked to the original, allowing pulsating animations through parameter adjustments in the Shape Editor.
Rendering “The Glint” in Maya involved extensive testing. Post-rendering, the images were processed in Nuke. Motion blur and depth of field were controlled using the “motionvector” and “Z” channels, respectively, to avoid lengthy render times and maintain control. The “motionvector” channel provided movement data for the “VectorBlur” node, while the “Z” channel’s depth data was used by the “ZDefocus” node. Foreground and background were rendered separately to manage extreme depth of field effects.
For atmospheric perspective, the “Z” channel was used again to blend distant mountains into the dusk scene, enhancing realism. Smartphone footage quality loss during digital zoom was simulated using a “Grain” node in Nuke, adjusting brightness and grain parameters.
Finally, After Effects was used to create distortion effects and flicker screens for the end screen, employing displacement maps and rapid seed value changes for brightness. This technique was also applied to the end credits, combining displacement maps and flicker footage with various effects.